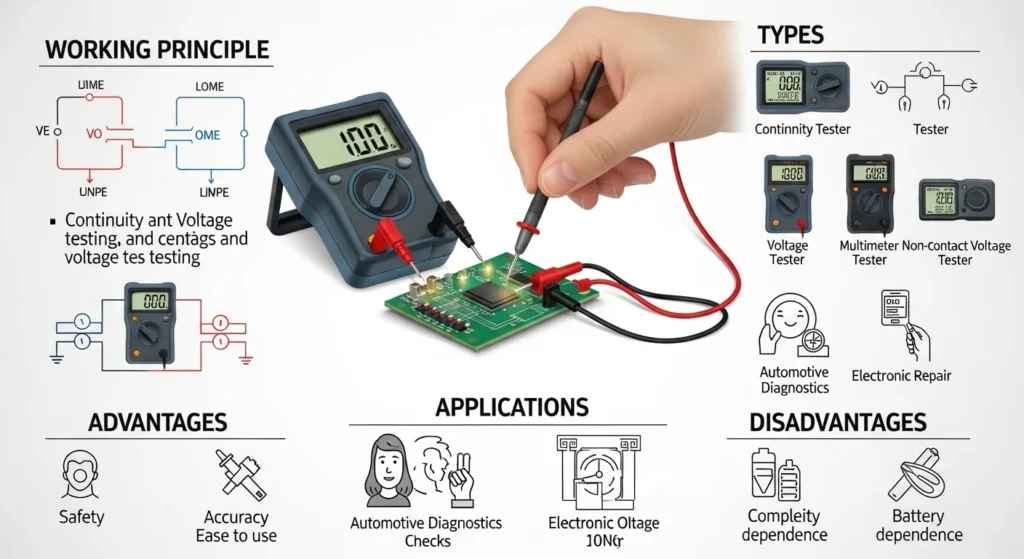

Imagine an electrician repairing a wall switch in a house. Before touching the wires, the electrician must confirm whether electricity is present in the circuit. Even if the breaker appears to be off, there may still be voltage in the wire due to wiring mistakes or shared circuits. In such situations, a Circuit Tester becomes an essential safety tool.
A circuit tester is one of the simplest yet most important electrical tools used by electricians, technicians, and engineers. It helps detect whether electrical voltage is present in a wire, outlet, or electrical device. Without proper testing, working on electrical systems can be extremely dangerous.
For electrical students and beginners, learning how to use a circuit tester is one of the first practical skills in electrical work. It helps prevent electric shocks, equipment damage, and wiring errors.
In this article, you will learn the Circuit Tester working principle, different types of testers, main components, and Circuit Tester applications in homes and industries. We will also discuss the Circuit Tester advantages and disadvantages, comparison with other tools, and tips for choosing the right tester.A Circuit Tester is a simple electrical tool used to check whether electric current is present in a circuit or not. It is widely used by electricians, technicians, and electrical students to test wires, switches, sockets, and other electrical components. The main purpose of a circuit tester is to identify live wires, detect faults in a circuit, and ensure that electricity is flowing properly through the system. It is a very useful and basic tool in electrical installation and maintenance work.
A typical circuit tester consists of a handle made of insulated material, a metal probe at the tip, a small neon lamp or LED inside the handle, and a metal clip or contact at the end. When the metal probe touches a live wire and the other end is connected to ground or touched by a finger, a small current flows through the tester. This current lights up the small lamp inside the tester, indicating that the circuit is live and electricity is present. If the lamp does not glow, it means that there is no electrical current in the circuit or the connection is broken.
Circuit testers are commonly used in homes, offices, and industrial electrical systems. Electricians use them to test electrical outlets, switches, fuse boxes, and distribution boards before starting repair work. This helps prevent electric shocks and ensures safety during electrical work. In many cases, a circuit tester is used before installing new electrical equipment to confirm that the power supply is correctly connected.
There are different types of circuit testers available depending on the application. Some testers are designed only to detect voltage in household wiring, while others are more advanced and can check continuity, polarity, and grounding. Modern electronic testers may also include digital displays for more accurate readings.
In conclusion, a circuit tester is an essential tool in electrical work. It helps identify live circuits, detect electrical faults, and improve safety when working with electricity. Because of its simple design and easy operation, it is one of the most commonly used tools in electrical testing and troubleshooting.
What Is a Circuit Tester?
A Circuit Tester is a simple electrical testing tool used to determine whether electrical voltage is present in a wire, outlet, switch, or electrical device. It is one of the most commonly used tools by electricians, technicians, and homeowners for basic electrical troubleshooting and safety checks.
Before performing any electrical installation, repair, or maintenance work, checking whether a circuit is live is essential. A circuit tester allows users to quickly verify the presence or absence of voltage, helping prevent accidental electric shocks and equipment damage.
Although a circuit tester is not as advanced as a multimeter, it provides a fast and reliable way to identify live circuits, making it an important tool for routine electrical work.
Clear Definition
A circuit tester is an electrical testing device designed to detect the presence of voltage in electrical circuits, wires, switches, sockets, outlets, terminals, and electrical equipment. It indicates whether a circuit is energized (live) or de-energized (dead), allowing users to work more safely.
Simple Explanation
The working principle of a circuit tester is straightforward. The tester is brought into contact with a wire, terminal, or electrical outlet. If electrical voltage is present, the tester provides a clear indication through one or more of the following methods:
- A glowing indicator lamp
- An LED light
- A digital display
- An audible buzzer (on some models)
If no indication appears, the circuit is generally not energized. However, it is always recommended to verify the tester on a known live source before and after testing to ensure it is functioning correctly.
Why Is a Circuit Tester Important?
A circuit tester is an essential safety tool because it helps electricians confirm whether power is present before touching electrical conductors.
Using a circuit tester can help:
- Prevent electric shock
- Verify whether a circuit is live
- Identify faulty switches or outlets
- Troubleshoot electrical problems
- Improve workplace safety
- Reduce the risk of equipment damage
- Save time during electrical inspections
Because it provides quick results, a circuit tester is often the first tool used before more detailed testing with a multimeter.
Practical Example
Suppose an electrician is installing a ceiling fan in a home. Before connecting the fan wires, they use a circuit tester to check the wire coming from the wall switch.
- If the tester lights up or produces an indication, it confirms that voltage is present and the circuit is live.
- If the tester does not respond, the electrician can investigate further to determine whether the circuit breaker is off, the switch is faulty, or there is another electrical issue.
This simple test helps ensure the installation is performed safely and correctly.
Another Real-Life Example
Imagine that a wall outlet suddenly stops working. Before replacing the outlet, a technician uses a circuit tester to check whether voltage is reaching the socket.
- If the tester indicates voltage, the outlet itself may be damaged.
- If no voltage is detected, the problem may be caused by a tripped circuit breaker, a loose connection, or a faulty electrical circuit.
This quick diagnosis saves time and helps identify the source of the problem more efficiently.
Key Features of a Circuit Tester
A standard circuit tester typically offers the following features:
- Compact and lightweight design
- Easy to carry and operate
- Quick voltage detection
- Suitable for residential and industrial use
- Available in analog and digital versions
- Requires minimal technical knowledge
- Provides fast and reliable safety checks
A circuit tester is a simple yet highly valuable electrical tool that helps users quickly determine whether a circuit is live, making electrical work safer, faster, and more efficient.
Circuit Tester Working Principle
The Circuit Tester working principle is based on detecting the presence of electrical voltage in a circuit. When the tester comes into contact with a live electrical conductor, a small amount of electrical energy flows through the tester’s internal circuit. This activates an indicator—such as a neon lamp, LED, buzzer, or digital display—showing that voltage is present.
A circuit tester does not measure detailed electrical values like a multimeter. Instead, it provides a quick and reliable indication of whether a circuit is live (energized) or dead (de-energized). This simple operation makes it one of the most commonly used tools for electrical installation, maintenance, and troubleshooting.
Understanding the working principle helps electricians and technicians use the tester correctly and safely before working on any electrical system.
Step-by-Step Working Process
The operation of a circuit tester can be understood in the following steps.
Step 1: Contact with the Electrical Point
The testing begins by placing the tester tip on the electrical point to be checked.
This may include:
- Electrical wire
- Switch terminal
- Wall socket
- Circuit breaker terminal
- Distribution board
- Appliance connection
The tester must make proper contact with the conductor for accurate detection.
Step 2: Voltage Detection
If the wire or terminal is connected to a live power source, electrical voltage reaches the tester through its metal tip.
The tester is designed to safely detect this voltage without drawing significant current from the circuit.
Step 3: Internal Circuit Activation
Inside the tester are electrical components that respond when voltage is detected.
Depending on the type of circuit tester, these components may include:
- Neon lamp
- LED
- Current-limiting resistor
- Electronic sensing circuit
- Microcontroller (in digital testers)
These components process the incoming electrical signal and prepare the output indication.
Step 4: Indicator Activation
Once the tester detects sufficient voltage, it activates its indicator.
The indication may be provided through:
- A glowing neon bulb
- A bright LED light
- A digital LCD display
- An audible buzzer
- A combination of light and sound
This immediately informs the user that the circuit is energized.
Step 5: User Confirmation
The electrician or technician observes the indicator.
- Indicator ON → The circuit is live and voltage is present.
- Indicator OFF → No voltage is detected, or the circuit is switched off.
Before beginning electrical work, it is good practice to confirm the tester’s operation by checking it on a known live circuit.
Working Process Summary
The complete working process of a circuit tester can be summarized as follows:
- The tester touches a wire, terminal, or electrical outlet.
- If voltage is present, electrical energy enters the tester.
- The internal detection circuit senses the voltage.
- The indicator lamp, LED, buzzer, or display activates.
- The user immediately knows whether the circuit is live or not.
This entire process takes only a fraction of a second, making circuit testers extremely useful for quick electrical inspections.
Easy Analogy
Imagine a doorbell system.
- The electrical wire is like the doorbell wiring.
- The voltage is like the electricity that powers the bell.
- The circuit tester acts like the doorbell itself.
- The indicator light or LED is like the sound of the bell.
When you press the doorbell button, electricity flows through the circuit and the bell rings, confirming that power is available.
Similarly, when a circuit tester touches a live wire, electrical voltage flows into the tester and activates the indicator. If the indicator lights up, it confirms that the circuit is carrying electricity. If nothing happens, the circuit is likely not energized.
This simple principle allows electricians to quickly and safely determine whether electrical voltage is present before performing installation, maintenance, or repair work.
Types of Circuit Tester
Circuit testers come in different types depending on their design and application.
Neon Circuit Tester
A Neon Circuit Tester is one of the simplest and most widely used electrical testing tools. It is mainly used to check whether AC voltage is present in a wire, switch, socket, or electrical terminal. Because of its simple design, low cost, and ease of use, it is a common tool carried by electricians, technicians, and maintenance workers for everyday electrical testing.
The tester contains a small neon bulb, a high-value resistor, a metal probe (tip), a conductive metal cap, and an insulated transparent handle. When the tester comes into contact with a live conductor and the user touches the metal cap, a very small and safe current flows through the internal resistor and neon bulb. This tiny current is enough to make the neon bulb glow, indicating that voltage is present.
Although a neon circuit tester is useful for quickly identifying live wires, it only detects the presence of voltage and does not measure voltage levels, current, or resistance like a digital multimeter.
Features
- Uses a small neon bulb as an indicator
- Detects AC voltage quickly
- Lightweight and easy to carry
- Simple and inexpensive
- Requires no battery
- Easy to operate
- Commonly used for household electrical work
Step-by-Step Working Process
The operation of a neon circuit tester is very simple and can be understood in the following steps.
Step 1: Hold the Tester Properly
Hold the tester by its insulated plastic handle to protect yourself from electric shock.
Never touch the metal probe while testing.
Step 2: Touch the Metal Tip to the Electrical Point
Place the metal tip of the tester on the electrical point you want to test, such as:
- Electrical wire
- Wall socket
- Switch terminal
- Distribution board terminal
- Fuse terminal
Ensure the tester makes proper contact with the conductor.
Step 3: Touch the Metal Cap
Place your finger on the metal cap located at the end of the tester handle.
Your body completes a very small electrical path that allows the neon bulb to operate safely.
Step 4: Voltage Reaches the Neon Bulb
If the wire is live, a tiny amount of current flows through:
- The tester tip
- High-value resistor
- Neon bulb
- Metal cap
- User’s body
- Ground
The resistor limits the current to an extremely safe level.
Step 5: Neon Bulb Glows
When sufficient voltage is present, the neon gas inside the bulb becomes energized and produces a bright orange glow.
This indicates that the electrical point being tested is carrying voltage.
Step 6: Interpret the Result
Observe the neon bulb carefully.
- Bulb Glows → Voltage is present (Live Wire)
- Bulb Does Not Glow → No voltage is detected, or the circuit is switched off
If the tester does not light up, always verify the tester on a known live circuit to ensure it is working correctly.
Applications
A neon circuit tester is commonly used for:
- Checking live wires
- Testing household switches
- Testing wall sockets
- Identifying phase wires
- Electrical installation work
- Routine maintenance
- Basic electrical troubleshooting
Advantages
- Very affordable
- No battery required
- Easy to use
- Compact and portable
- Quick voltage detection
- Reliable for basic household electrical testing
Limitations
- Detects only the presence of voltage
- Cannot measure voltage accurately
- Not suitable for DC circuits in most cases
- Cannot measure current or resistance
- Less effective for advanced electrical diagnostics
Easy Analogy
Think of a neon circuit tester like a doorbell indicator.
- The live wire is like the electricity supplying the doorbell.
- The tester tip acts like the doorbell button.
- The neon bulb acts like the doorbell light.
- When electricity reaches the tester, the neon bulb lights up, just as a doorbell rings when power flows through it.
In simple terms, a neon circuit tester acts as a quick electrical indicator. It tells you whether electricity is present in a wire or terminal, helping electricians work more safely and efficiently.
Test Lamp Circuit Tester
A Test Lamp Circuit Tester is a basic electrical testing device used to check whether electrical voltage is present in a circuit. It consists of a small incandescent or LED lamp connected to two insulated test wires with probes or clips at their ends. When the tester is connected across a live (phase) conductor and a neutral or ground conductor, the lamp lights up if voltage is present.
Because of its simple construction and reliable operation, the test lamp circuit tester has been widely used by electricians for many years. Although modern digital testers and multimeters are now more common, test lamp testers are still useful for basic electrical inspections, troubleshooting, and maintenance work.
Unlike a neon tester, which only indicates the presence of voltage, a test lamp requires a complete electrical path between the live and neutral (or ground) conductors before the lamp will glow.
Features
- Uses a small incandescent bulb or LED as an indicator
- Consists of two insulated test wires
- Detects the presence of electrical voltage
- Easy to use and inexpensive
- Does not require complex controls
- Suitable for basic electrical testing
- Provides a clear visual indication when voltage is present
Step-by-Step Working Process
The operation of a test lamp circuit tester is simple and easy to understand.
Step 1: Connect One Lead to the Live Terminal
The first test lead is connected to the live (phase) wire or terminal that needs to be tested.
Step 2: Connect the Second Lead to Neutral or Ground
The second test lead is connected to the neutral wire or a properly grounded metal part of the electrical system.
This completes the testing circuit.
Step 3: Electrical Current Flows Through the Lamp
If voltage is present, a small electrical current flows from the live conductor through the lamp and returns through the neutral or ground connection.
Step 4: The Lamp Illuminates
As current passes through the lamp filament or LED, it lights up.
A glowing lamp confirms that electrical voltage is present at the test point.
Step 5: Interpret the Result
Observe the lamp carefully.
- Lamp ON → The circuit is live, and voltage is present.
- Lamp OFF → No voltage is detected, or the circuit is open or switched off.
Applications
A test lamp circuit tester is commonly used for:
- Testing live electrical wires
- Checking wall outlets and sockets
- Verifying switch operation
- Troubleshooting lighting circuits
- Inspecting household electrical installations
- Basic electrical maintenance
- Confirming power before repairs
Advantages
- Simple and reliable design
- Easy to operate
- Low cost
- Clear visual indication
- No complicated settings
- Suitable for basic electrical troubleshooting
Limitations
- Requires access to both live and neutral (or ground)
- Does not measure the exact voltage value
- Cannot measure resistance or current
- Not suitable for advanced electrical diagnostics
- Less versatile than a digital multimeter
Easy Analogy
Think of a test lamp circuit tester like a light bulb connected between two ends of a battery.
- The live wire supplies electrical power.
- The neutral wire provides the return path.
- The test lamp acts like the bulb in the circuit.
When both connections are complete, electricity flows through the lamp, causing it to light. In the same way, a test lamp circuit tester glows only when a complete electrical path exists, confirming that the circuit is energized and voltage is present.
Non-Contact Voltage Tester
A Non-Contact Voltage Tester (NCVT) is a modern electrical testing tool that detects the presence of AC voltage without making direct contact with a bare wire or electrical terminal. Instead of touching the conductor, the tester senses the electromagnetic field generated around a live wire and alerts the user through a light, sound, or both.
Because it does not require direct electrical contact, a non-contact voltage tester is considered one of the safest tools for quickly identifying live circuits. It is widely used by electricians, maintenance technicians, and homeowners for routine electrical inspections and safety checks before starting any electrical work.
Although a non-contact voltage tester can quickly determine whether voltage is present, it cannot measure the exact voltage value. For detailed electrical measurements, a digital multimeter is still required.
Features
- Detects AC voltage without direct contact
- Uses electromagnetic field detection technology
- High level of user safety
- Quick and easy to operate
- Provides visual and audible alerts
- Compact and portable
- Battery-powered
- Suitable for residential, commercial, and industrial applications
Step-by-Step Working Process
The operation of a non-contact voltage tester is simple and requires only a few steps.
Step 1: Turn On the Tester
Press the power button to switch on the tester.
Most models perform a self-test by flashing an LED or producing a short beep to indicate that the device is ready for use.
Step 2: Bring the Tester Near the Electrical Point
Hold the tip of the tester close to the electrical point you want to check.
Common testing points include:
- Electrical wires
- Wall outlets
- Switches
- Circuit breakers
- Extension cords
- Electrical cables
The tester does not need to touch the conductor directly.
Step 3: Detect the Electromagnetic Field
If the conductor is carrying AC voltage, it produces an electromagnetic field around the wire.
The sensor inside the tester detects this field without allowing electrical current to pass through the device.
Step 4: Internal Electronic Circuit Processes the Signal
The tester’s internal electronic components analyze the detected electromagnetic field.
If the signal is strong enough, the tester recognizes that the circuit is energized.
Step 5: Indicator Activates
Once voltage is detected, the tester alerts the user by activating one or more indicators, such as:
- Bright LED light
- Audible buzzer
- Flashing light
- Combination of light and sound
Some advanced models also use vibration alerts.
Step 6: Interpret the Result
Observe the tester’s indication.
- Light or Beep ON → AC voltage is present, and the circuit is live.
- No Light or Beep → No AC voltage is detected, or the circuit is switched off.
For safety, always test the device on a known live circuit before and after use to confirm that it is working properly.
Applications
A non-contact voltage tester is commonly used for:
- Checking live electrical wires
- Testing wall outlets
- Identifying live circuit breakers
- Inspecting extension cords
- Detecting voltage before repairs
- Household electrical maintenance
- Industrial electrical inspections
- Routine safety checks
Advantages
- No direct contact with live conductors
- Safer than traditional voltage testers
- Fast and convenient operation
- Easy for beginners to use
- Portable and lightweight
- Reduces the risk of electric shock
- Ideal for quick safety inspections
Limitations
- Detects only AC voltage in most models
- Cannot measure the exact voltage value
- May not detect shielded or deeply insulated wires accurately
- Requires batteries for operation
- Does not measure current, resistance, or continuity
Easy Analogy
Imagine a metal detector used at an airport.
The detector does not need to touch a metal object. It simply senses the presence of metal when it comes close.
A non-contact voltage tester works in a similar way. Instead of detecting metal, it senses the electromagnetic field produced by a live electrical wire. When it detects this field, it lights up or beeps to let you know that voltage is present.
This simple, contact-free operation makes the non-contact voltage tester one of the safest and most convenient tools for quickly checking whether an electrical circuit is live before beginning maintenance or repair work.
Digital Circuit Tester
A Digital Circuit Tester is an advanced electrical testing device used to detect and measure electrical parameters such as voltage, continuity, resistance, and polarity. Unlike traditional circuit testers that simply indicate whether a circuit is live, a digital circuit tester provides accurate numerical readings on an LCD or LED display, making it a valuable tool for electricians, engineers, and maintenance technicians.
Digital circuit testers use electronic circuits and microprocessors to analyze electrical signals and display precise measurement results. They are widely used in residential, commercial, industrial, and automotive electrical systems because of their high accuracy, ease of use, and multiple testing capabilities.
Although a digital circuit tester is more advanced than a neon tester or test lamp, it is still simple enough for beginners to use while offering the precision required by professionals.
Features
- Large digital LCD or LED display
- High measurement accuracy
- Fast response time
- Multiple electrical testing functions
- Easy-to-read numerical values
- Compact and portable design
- Battery-powered operation
- Suitable for professional electrical work
Step-by-Step Working Process
The working process of a digital circuit tester is simple and provides accurate results in just a few seconds.
Step 1: Turn On the Tester
Press the power button to switch on the digital circuit tester.
The digital display becomes active and the tester performs a quick internal check.
Step 2: Select the Appropriate Testing Mode
Depending on the tester model, choose the required function, such as:
- Voltage testing
- Continuity testing
- Resistance testing
- Polarity checking
Some digital testers automatically select the correct testing mode.
Step 3: Connect the Test Probes
Place the test probes on the electrical points to be tested.
For example:
- One probe on the live terminal
- The other probe on the neutral or ground terminal
Ensure the probes make firm contact for accurate readings.
Step 4: Electrical Signal Is Detected
The tester’s internal electronic circuit detects the electrical signal coming from the circuit.
A built-in microprocessor processes the information and converts it into a readable value.
Step 5: Display the Measurement
The digital screen displays the measured result.
Depending on the selected function, it may show:
- AC voltage
- DC voltage
- Resistance (Ω)
- Continuity indication
- Polarity information
This allows the user to obtain precise electrical measurements instead of a simple ON/OFF indication.
Step 6: Interpret the Reading
Read the displayed value and compare it with the expected electrical specifications.
For example:
- Correct voltage indicates a healthy power supply.
- Zero voltage indicates no electrical supply.
- Low resistance may indicate good continuity.
- Infinite resistance may indicate an open circuit.
Applications
Digital circuit testers are commonly used for:
- Testing household electrical wiring
- Inspecting electrical outlets and switches
- Troubleshooting industrial control panels
- Electrical installation work
- Preventive maintenance
- Automotive electrical diagnostics
- Repairing electrical equipment
- Educational and laboratory testing
Advantages
- High measurement accuracy
- Easy-to-read digital display
- Multiple testing functions in one device
- Fast and reliable results
- Suitable for both beginners and professionals
- Compact and portable
- Improves troubleshooting efficiency
- Provides more information than traditional testers
Limitations
- More expensive than basic circuit testers
- Requires batteries for operation
- Sensitive electronic components require careful handling
- Some models require basic knowledge to use advanced functions
Easy Analogy
Think of a digital circuit tester like a digital thermometer.
A traditional thermometer may only tell you whether something is hot or cold, while a digital thermometer shows the exact temperature on its screen.
Similarly, a basic circuit tester only tells you whether electricity is present. A digital circuit tester goes a step further by displaying accurate electrical measurements, allowing electricians and engineers to diagnose electrical problems more quickly and accurately.
Because of its precision, versatility, and ease of use, the digital circuit tester has become one of the most important tools for modern electrical testing and troubleshooting.
Screwdriver-Type Circuit Tester
A Screwdriver-Type Circuit Tester is one of the most common and widely used electrical testing tools in homes and workplaces. It looks similar to a standard screwdriver but contains a small neon lamp, a high-value resistor, and a metal contact cap inside its transparent insulated handle. Its primary purpose is to detect the presence of AC voltage in electrical wires, sockets, switches, and terminals.
Because of its compact size, lightweight design, and simple operation, the screwdriver-type circuit tester is a favorite tool among electricians, technicians, and homeowners. It allows users to quickly identify whether a wire or terminal is live before carrying out electrical installation, maintenance, or repair work.
Although it resembles a screwdriver, it should be used mainly for voltage testing rather than tightening or loosening screws, unless it is specifically designed for both purposes.
Features
- Designed like a standard screwdriver
- Contains a built-in neon lamp
- Transparent insulated handle
- Lightweight and easy to carry
- Requires no battery
- Simple and inexpensive
- Quick AC voltage detection
- Commonly used for household electrical work
Step-by-Step Working Process
The operation of a screwdriver-type circuit tester is simple and takes only a few seconds.
Step 1: Hold the Tester by the Insulated Handle
Hold the tester using its transparent insulated handle.
Avoid touching the metal tip while performing the test.
Step 2: Place the Metal Tip on the Electrical Point
Touch the metal tip of the tester to the electrical point you want to check.
Common testing points include:
- Wall sockets
- Light switches
- Electrical wires
- Distribution boards
- Fuse terminals
- Appliance terminals
Step 3: Touch the Metal Contact Cap
Place your finger on the metal contact cap located at the end of the tester handle.
This allows a very small and safe current to pass through the tester’s internal circuit.
Step 4: Internal Circuit Detects Voltage
If the conductor is carrying AC voltage, a tiny current flows through:
- The tester tip
- Internal resistor
- Neon lamp
- Metal contact cap
- User’s body
- Ground
The resistor limits the current to a safe level while allowing the neon lamp to operate.
Step 5: Neon Lamp Lights Up
When sufficient voltage is present, the neon lamp inside the handle glows.
The glowing lamp clearly indicates that the wire or terminal is live.
Step 6: Interpret the Result
Observe the neon lamp carefully.
- Neon Lamp ON → Voltage is present, and the circuit is live.
- Neon Lamp OFF → No voltage is detected, or the circuit is switched off.
For safety, always verify the tester on a known live source before and after testing.
Applications
A screwdriver-type circuit tester is commonly used for:
- Checking wall sockets
- Testing electrical switches
- Identifying live wires
- Inspecting extension boards
- Verifying electrical outlets
- Household electrical repairs
- Basic maintenance work
- Quick electrical safety checks
Advantages
- Very affordable
- Compact and portable
- Easy to operate
- No battery required
- Provides quick voltage detection
- Ideal for household electrical testing
- Convenient to carry in a toolbox or pocket
Limitations
- Detects only AC voltage
- Does not measure the exact voltage value
- Cannot measure current or resistance
- Not suitable for advanced electrical diagnostics
- Requires the user to touch the metal contact cap during operation
Easy Analogy
Think of a screwdriver-type circuit tester like a warning light on a machine.
When the machine receives electrical power, the warning light turns on to show that electricity is present.
In the same way, when the tester touches a live wire and you place your finger on the contact cap, the neon lamp inside the tester lights up, confirming that the circuit is energized.
Its simple design, quick operation, and reliable voltage detection make the screwdriver-type circuit tester one of the most widely used tools for everyday electrical testing in homes and small electrical installations.
Main Components of a Circuit Tester
A circuit tester may look like a simple tool, but it contains several important components that work together to detect electrical voltage safely and accurately. Each part has a specific function, ensuring the tester operates reliably during electrical inspections and troubleshooting.
Understanding these components helps electricians, technicians, and beginners use the tester correctly and appreciate how it detects live electrical circuits.
1. Test Probe Tip
The test probe tip is the metal point located at the front of the circuit tester. It is the first part that comes into contact with the electrical wire, terminal, socket, or switch being tested.
The probe is made from conductive metal so it can safely transfer electrical voltage into the tester’s internal circuit.
Function
- Makes contact with the electrical conductor
- Detects the presence of electrical voltage
- Transfers voltage to the tester’s internal components
- Starts the testing process
2. Indicator Lamp or LED
The indicator lamp or LED is the component that provides a visual indication when voltage is detected.
Traditional circuit testers usually use a neon lamp, while modern digital testers often use LED indicators.
When electrical voltage reaches the tester, the indicator lights up, showing that the circuit is live.
Function
- Indicates the presence of electrical voltage
- Provides a clear visual signal
- Helps identify live circuits quickly
- Improves user safety during testing
3. Internal Resistor
An internal resistor is one of the most important safety components inside a circuit tester.
Its purpose is to limit the amount of electrical current flowing through the tester, protecting both the user and the internal components.
Without this resistor, excessive current could damage the tester or create a dangerous situation.
Function
- Limits electrical current
- Protects the user from electric shock
- Prevents damage to the tester
- Ensures safe operation during testing
4. Transparent Insulated Body
Most circuit testers have a transparent insulated plastic body that protects the user while allowing the internal indicator to remain visible.
The insulated handle prevents direct contact with live electrical parts, reducing the risk of electric shock.
Function
- Protects the user from live conductors
- Provides a comfortable grip
- Allows easy viewing of the neon lamp or LED
- Improves overall safety during electrical testing
5. Finger Contact Plate
The finger contact plate is commonly found at the top of screwdriver-type circuit testers.
During testing, the user places a finger on this metal plate. This completes a very small electrical path that allows the tester’s neon lamp to illuminate when voltage is present.
The current flowing through the tester is extremely small because it is limited by the internal resistor.
Function
- Completes the tester’s electrical circuit
- Allows the neon lamp to operate
- Helps detect live AC voltage
- Enables proper operation of screwdriver-type testers
6. Internal Wiring
Inside the tester are small electrical wires that connect the probe tip, resistor, indicator, and contact plate.
These connections allow electrical signals to travel through the tester safely and efficiently.
Function
- Connects all internal components
- Transfers electrical signals
- Ensures reliable tester operation
- Supports accurate voltage detection
Component Summary Table
| Component | Description | Primary Function |
|---|---|---|
| Test Probe Tip | Metal tip at the front of the tester | Detects voltage from the electrical circuit |
| Indicator Lamp or LED | Neon bulb or LED inside the tester | Shows whether voltage is present |
| Internal Resistor | High-value resistor inside the tester | Limits current and improves safety |
| Transparent Insulated Body | Plastic outer housing | Protects the user and allows indicator visibility |
| Finger Contact Plate | Metal cap at the top of screwdriver testers | Completes the electrical circuit during testing |
| Internal Wiring | Electrical connections inside the tester | Connects components and carries the electrical signal |
How These Components Work Together
The complete operation of a circuit tester follows a simple sequence:
Step 1: The Test Probe Touches the Circuit
The metal probe touches the electrical wire, socket, switch, or terminal that needs to be tested.
Step 2: Voltage Enters the Tester
If the circuit is live, electrical voltage enters through the test probe and travels into the tester.
Step 3: The Internal Resistor Controls the Current
The resistor limits the current to a very small and safe level, protecting both the tester and the user.
Step 4: The Indicator Activates
The neon lamp or LED receives the electrical signal and lights up, indicating that voltage is present.
Step 5: The User Observes the Result
The user looks through the transparent body to see the glowing indicator.
- Indicator ON → The circuit is live.
- Indicator OFF → No voltage is detected.
This simple yet effective design allows a circuit tester to provide quick, reliable, and safe voltage detection, making it an essential tool for electrical installation, maintenance, and troubleshooting.
Advantages of Using a Circuit Tester
A circuit tester is one of the most useful tools for quickly checking the presence of electrical voltage. It is widely used by electricians, technicians, maintenance workers, and homeowners because it is simple, affordable, and easy to operate.
Understanding the advantages of a circuit tester helps users know why it is an essential tool for everyday electrical testing and troubleshooting.
Key Advantages
1. Simple and Easy to Use
A circuit tester has a straightforward design and does not require advanced technical knowledge.
Even beginners can quickly learn how to use it for basic voltage detection.
2. Quick Voltage Detection
A circuit tester provides almost instant results.
Within seconds, it indicates whether a wire, outlet, switch, or terminal is live, allowing electricians to work more efficiently.
3. Affordable and Cost-Effective
Compared to advanced electrical testing equipment, circuit testers are inexpensive.
They provide an economical solution for basic electrical inspections and troubleshooting.
4. Portable and Lightweight
Most circuit testers are compact enough to fit inside a toolbox or pocket.
Their lightweight design makes them easy to carry during fieldwork and maintenance jobs.
5. Improves Electrical Safety
One of the biggest advantages of a circuit tester is improved workplace safety.
By confirming whether a circuit is live before beginning work, it helps reduce the risk of electric shock and accidental contact with energized conductors.
6. Fast Troubleshooting
Circuit testers allow technicians to quickly identify live and dead circuits.
This reduces troubleshooting time and helps locate electrical problems more efficiently.
7. No Complicated Setup
Most basic circuit testers are ready to use immediately.
Simply touch the tester to the electrical point and observe the indicator.
There are no complex settings or calibration procedures.
8. Suitable for Routine Maintenance
Circuit testers are ideal for daily electrical inspections and preventive maintenance.
They help verify power availability before installation, repair, or maintenance work.
Real-World Benefits
Circuit testers provide practical advantages in many everyday electrical tasks.
For example:
- Electricians use them to identify live wires before replacing switches or sockets.
- Maintenance technicians verify that circuits are de-energized before servicing equipment.
- Homeowners use them to check whether an electrical outlet has power.
- Industrial workers inspect control panels before carrying out maintenance.
These quick checks improve safety, reduce downtime, and help prevent unnecessary electrical accidents.
Disadvantages and Limitations of a Circuit Tester
Although a circuit tester is an excellent tool for detecting voltage, it has several limitations. Understanding these limitations helps users know when a more advanced testing instrument is required.
Common Limitations
1. Cannot Measure Exact Voltage
Basic circuit testers only indicate whether voltage is present.
They cannot display the actual voltage value like a digital multimeter.
2. Limited Testing Functions
Most circuit testers are designed only for voltage detection.
They generally cannot measure:
- Resistance
- Current
- Continuity
- Frequency
- Capacitance
3. May Not Detect Low Voltage
Some traditional circuit testers require a minimum voltage before the indicator activates.
Very low voltages may not be detected accurately.
4. User Contact Required in Some Models
Screwdriver-type circuit testers require the user to touch the metal contact plate during testing.
Although the internal resistor limits the current to a safe level, some users may prefer non-contact voltage testers for additional safety.
5. Less Accurate Than Advanced Test Instruments
Circuit testers provide a simple indication rather than detailed electrical measurements.
For accurate diagnostics, technicians often use:
- Digital multimeters
- Clamp meters
- Insulation resistance testers (Meggers)
- Power quality analyzers
6. Cannot Detect Every Electrical Fault
A circuit tester confirms the presence or absence of voltage but cannot identify complex problems such as:
- Insulation failure
- Turn-to-turn winding faults
- Voltage fluctuations
- Harmonic distortion
- Internal equipment failures
When Should You Use a More Advanced Tester?
If detailed electrical measurements or fault analysis are required, professionals typically use advanced instruments such as:
- Digital Multimeter
- Clamp Meter
- Insulation Resistance Tester (Megger)
- Earth Resistance Tester
- Power Analyzer
These tools provide more accurate information for professional troubleshooting and maintenance.
Applications of a Circuit Tester
The applications of a circuit tester are extensive in residential, commercial, and industrial electrical work. Because it quickly detects electrical voltage, it is one of the first tools used during installation, maintenance, inspection, and troubleshooting.
1. Home Electrical Maintenance
Circuit testers are commonly used in homes to verify whether electrical power is present before carrying out repairs or installations.
Common applications include:
- Checking wall sockets
- Testing light switches
- Inspecting extension cords
- Verifying power outlets
- Testing ceiling fan wiring
- Checking lighting circuits
These quick inspections improve safety during household electrical work.
2. Electrical Installation Work
During electrical installations, electricians use circuit testers to confirm that circuits are properly energized before completing wiring connections.
Typical installation tasks include:
- House wiring
- Office wiring
- Distribution board installation
- Switch installation
- Socket installation
- Lighting system installation
3. Industrial Electrical Systems
Industrial maintenance technicians use circuit testers during routine inspections and troubleshooting of electrical equipment.
Applications include:
- Motor control panels
- Distribution panels
- Control circuits
- Industrial machinery
- Power distribution systems
- Manufacturing equipment
Regular voltage checks help reduce equipment downtime and improve operational safety.
4. Appliance Repair
Circuit testers are valuable tools for repairing electrical appliances.
Technicians use them to:
- Identify live wires
- Check incoming power supply
- Verify electrical connections
- Troubleshoot faulty appliances
- Confirm safe working conditions before repairs
5. Safety Testing
Before servicing any electrical equipment, technicians must verify that the power supply has been disconnected.
Circuit testers are commonly used to:
- Confirm circuit isolation
- Check lockout/tagout procedures
- Verify de-energized equipment
- Improve workplace safety
- Reduce the risk of electric shock
6. Educational and Training Purposes
Circuit testers are widely used in:
- Electrical engineering laboratories
- Technical colleges
- Vocational training institutes
- Practical electrical workshops
Students learn the basics of electrical safety and voltage detection before working with more advanced measuring instruments.
7. Routine Preventive Maintenance
Maintenance teams use circuit testers as part of regular inspection programs to ensure electrical systems remain safe and operational.
Routine tasks include:
- Checking power availability
- Inspecting electrical panels
- Verifying circuit operation
- Identifying faulty connections
- Monitoring electrical safety conditions
Why Circuit Testers Are So Widely Used
Circuit testers remain popular because they offer a combination of simplicity, portability, and reliability. Whether checking a household outlet, inspecting an industrial control panel, or verifying power before maintenance, they provide a fast and effective way to determine if a circuit is live. While they cannot replace advanced instruments like digital multimeters, they are an essential first-line tool for safe and efficient electrical work.
Comparison: Circuit Tester vs Multimeter
Understanding the difference between circuit tester and multimeter is important for beginners.
| Feature | Circuit Tester | Multimeter |
|---|---|---|
| Main Function | Detects voltage presence | Measures voltage, current, resistance |
| Complexity | Very simple | More advanced |
| Cost | Low | Higher |
| Accuracy | Basic detection | High accuracy |
| Applications | Quick safety check | Detailed electrical measurement |
Key Difference
The main difference between circuit tester and multimeter is that a tester only detects voltage presence, while a multimeter measures electrical values.
Selection Guide: How to Choose the Right Circuit Tester
Choosing the right circuit tester is important for safe, accurate, and efficient electrical testing. Different types of circuit testers are designed for different applications, so selecting the correct one depends on the type of work you perform, the electrical system you are testing, and the level of accuracy you need.
Whether you are a homeowner, electrical student, technician, or professional electrician, considering the following factors will help you choose the most suitable circuit tester.
Important Factors to Consider
1. Safety Rating
Safety should always be your top priority when selecting a circuit tester.
Choose a tester that complies with recognized electrical safety standards and is suitable for the voltage levels you will be working with. A properly rated tester provides better protection against electric shock and accidental overload.
Best For:
- Household electrical work
- Commercial installations
- Industrial maintenance
2. Type of Circuit Tester
Different testing jobs require different types of testers.
Choose a tester based on your application.
Common options include:
- Screwdriver-Type Circuit Tester
- Neon Circuit Tester
- Test Lamp Circuit Tester
- Non-Contact Voltage Tester
- Digital Circuit Tester
For maximum safety, many professionals prefer a Non-Contact Voltage Tester for quick voltage checks before touching electrical conductors.
3. Measurement Capability
Consider what information you need from the tester.
Some testers only indicate whether voltage is present, while others provide additional functions such as:
- AC voltage detection
- DC voltage detection
- Continuity testing
- Polarity checking
- Resistance measurement
If you require detailed diagnostics, a Digital Circuit Tester or Digital Multimeter may be a better choice.
4. Build Quality
A well-built tester offers better durability and long-term reliability.
Look for features such as:
- Strong insulated body
- High-quality test probes
- Impact-resistant construction
- Comfortable grip
- Durable internal components
A quality tester performs more reliably in demanding working environments.
5. Ease of Use
Choose a tester that is simple to operate.
Features that improve usability include:
- Clear indicator lights
- Easy-to-read digital display
- Audible buzzer
- Automatic voltage detection
- Lightweight design
These features help both beginners and experienced electricians perform tests more efficiently.
6. Application
Select a tester that matches the type of electrical work you perform.
Examples include:
Home Electrical Work
- Screwdriver tester
- Non-contact voltage tester
Commercial Installations
- Digital circuit tester
- Non-contact voltage tester
Industrial Maintenance
- Digital circuit tester
- Multimeter
- Advanced voltage tester
Electronics Repair
- Digital circuit tester
- Precision multimeter
Tips for Beginners
If you are new to electrical testing, follow these simple recommendations.
- Start with a simple Screwdriver-Type Circuit Tester or Non-Contact Voltage Tester.
- Read the manufacturer’s instructions before use.
- Always test the tester on a known live circuit before and after testing.
- Never use a damaged tester.
- Hold the tester by its insulated handle.
- Wear appropriate personal protective equipment (PPE).
- Never perform testing on wet surfaces.
- Disconnect power whenever possible before working on electrical equipment.
- If you are unsure about a reading, verify it using a digital multimeter.
Following these safety practices helps reduce the risk of electrical accidents and improves testing accuracy.
Common Problems and Solutions
Like any electrical tool, a circuit tester may sometimes produce unexpected results. Understanding common problems and their solutions helps users troubleshoot the tester quickly and perform accurate electrical inspections.
Problem 1: Why Doesn’t the Circuit Tester Light Up?
Possible Causes
- No electrical voltage is present.
- The circuit breaker is switched OFF.
- The tester is faulty.
- The battery is discharged (for battery-powered testers).
- Poor contact with the electrical terminal.
- The internal indicator lamp is damaged.
Solution
- Test the circuit on another known live power source.
- Check the circuit breaker or fuse.
- Ensure the tester makes firm contact with the conductor.
- Replace the battery if required.
- Replace the tester if it is defective.
Problem 2: Why Does the Tester Give False Readings?
Possible Causes
- Electromagnetic interference (EMI)
- Nearby energized conductors
- Low-quality tester
- Incorrect testing technique
- Strong external electrical fields
Solution
- Repeat the test carefully.
- Use a high-quality tester.
- Confirm the result with a digital multimeter.
- Keep the tester away from nearby energized cables when possible.
Problem 3: Why Doesn’t the Indicator Lamp Work?
Possible Causes
- Burned-out neon bulb or LED
- Internal circuit failure
- Battery failure (digital testers)
- Physical damage
Solution
- Replace the battery if applicable.
- Inspect the tester for damage.
- Replace the tester if the indicator no longer functions.
Problem 4: Why Does the Tester Work Intermittently?
Possible Causes
- Loose contact with the conductor
- Dirty probe tip
- Worn internal components
- Damaged wiring inside the tester
Solution
- Clean the probe tip.
- Ensure firm contact with the testing point.
- Replace worn or damaged testers.
- Avoid using damaged testing equipment.
Problem 5: Why Is the Reading Different Each Time?
Possible Causes
- Poor electrical connection
- Unstable power supply
- Incorrect probe placement
- Faulty tester
Solution
- Hold the tester steadily.
- Repeat the measurement.
- Verify the circuit using another testing instrument.
- Replace the tester if inconsistent readings continue.
Future Trends in Circuit Tester Technology
Electrical testing technology continues to improve as safety standards and digital electronics advance. Modern circuit testers are becoming more accurate, easier to use, and capable of performing multiple diagnostic functions.
The future of circuit testers focuses on improving user safety, increasing measurement accuracy, and simplifying electrical troubleshooting.
Smart Voltage Testers
Modern circuit testers now include intelligent electronic circuits that automatically detect voltage and provide faster, more reliable results.
Many smart testers feature:
- Automatic voltage recognition
- Digital LCD displays
- Audible and visual alerts
- Auto-ranging functions
- Improved measurement accuracy
Non-Contact Smart Detection
Future non-contact voltage testers use highly sensitive sensors to detect electrical fields more accurately.
These advanced testers offer:
- Longer detection range
- Improved sensitivity
- Faster voltage detection
- Better performance in crowded electrical panels
Wireless and Bluetooth Connectivity
Some advanced electrical testers now support wireless communication.
These devices can:
- Transfer measurement data to smartphones
- Store test records digitally
- Generate maintenance reports
- Support remote monitoring and diagnostics
Wireless technology helps improve maintenance efficiency and documentation.
Integrated Safety Features
New-generation circuit testers are designed with enhanced safety features, including:
- Improved insulation
- Overvoltage protection
- Reverse polarity protection
- CAT safety ratings
- Automatic self-testing
- Low battery warnings
These features help protect both the user and the testing equipment.
Multi-Function Electrical Testers
Modern testing devices combine several electrical testing functions into a single instrument.
Depending on the model, one device may perform:
- Voltage testing
- Continuity testing
- Resistance measurement
- Polarity checking
- Phase identification
- Frequency measurement
- Non-contact voltage detection
This reduces the need to carry multiple testing tools.
Digital Diagnostics and Smart Maintenance
Future electrical maintenance increasingly relies on digital diagnostic technology.
Advanced circuit testers may soon include:
- AI-assisted fault detection
- Automatic circuit analysis
- Predictive maintenance support
- Cloud-based test record storage
- Real-time electrical monitoring
These innovations will help electricians diagnose problems more quickly, improve workplace safety, and reduce equipment downtime while making electrical testing more efficient than ever before.
Conclusion
A Circuit Tester is a simple yet extremely important electrical tool used to detect the presence of voltage in electrical circuits. It helps electricians, technicians, and engineers ensure safety before performing electrical work.
Understanding the Circuit Tester working principle, types, and Circuit Tester applications is essential for anyone working with electrical systems. From household wiring checks to industrial maintenance, circuit testers provide quick and reliable voltage detection.
Although circuit testers have limitations compared to advanced measuring instruments, their simplicity, affordability, and portability make them an essential part of every electrician’s toolkit.
For beginners in electrical engineering or technical training, learning to properly use a circuit tester is a fundamental step toward safe and professional electrical practice.